Saturday, 30 April 2016

Select Many Checkbox LOV

ADF Select Many Listbox / Select Many Checkbox LOV


Few days back ,I was looking for an inbuilt feature of multi-select LOV in ADF and was quite surprised that ADF does not have this feature as a part of available LOV bindings.We cannot bind the LOV's to a selectManyListBox directly.To Achieve this we need to use a managed bean to dispatch between the ADF binding layer and the multi select component.The ADF selectManyListbox component allows the user to select many values from a list of items. It can contain any number of <f:selectitem>, <f:selectitems>, or <af:selectitem> components, each of which represents an available option that the user may select.

A typical ADF Multi select LOV looks like this :

<af:selectmanylistbox required="yes" value="#{bean.aValue}">
  <f:selectitem itemlabel="Option1" itemvalue="1">
  <f:selectitem itemlabel="Option1" itemvalue="2">
</f:selectitem></f:selectitem></af:selectmanylistbox>


Step 1 :

 1) Prepare a List of items that your Multi select LOV holds in a Managed Bean.The SelectManyListbox and -Choice value property writes/reads its value to/from a List (e.g. ArrayList)

private List<selectitem> actualList;
       public MultiSelect() {

        super();

        actualList = new ArrayList<selectitem>();
        actualList.add(new SelectItem("ACTIVE", "ACTIVE"));
        actualList.add(new SelectItem("INACTIVE", "INACTIVE"));
        actualList.add(new SelectItem("COMPLETED", "COMPLETED"));

2)
Drag and drop the selectManyListbox component from Jdev Component palette on to the page and bind it to the list created above from managed bean. After creating list it should look like below code .Also create an another list with getters and setters in the managed bean and bind to the value property of af:selectManyListbox manually.

  <af:selectManyListbox label="Label 1" id="sml1"
                              value="#{backingBeanScope.MultiSelect.lovValue}">
          <f:selectItems
                         id="si2"
                         value="#{backingBeanScope.MultiSelect.actualList}"/>
  </af:selectManyListbox>


private List<selectitem> lovValue;
    public void setLovValue(List<selectitem> lovValue) {
     
        this.lovValue = lovValue;
    }

    public List<selectitem> getLovValue() {
      
      
     return lovValue;
    }

  Input screen :


After checking the required value click the commandbutton and in the jdev console you will see the output like this

Selected Value:ACTIVE
Selected Value:COMPLETED
All you need to do is when the getter is called you make sure the data is read from where it is created .when you write back take the list transform its entries in to the way you want. some may want to create comma delimited list of string,semi-colon separated ,individual strings which they want to store in DB .

ADF currently doesn't support binding the selectManyListBox value to the VO attribute directly this is the approach that I have followed as workaround!!

Wednesday, 27 April 2016

ADF ViewLink

ADF ViewLink - Cardinality & Accessor

Oracle ADF view links are business components that defines a relationship between two ADF view objects . when we say relationship between two ADF view objects and it is obvious it can be used in Master-Detail data representation .
In general view objects contains query that queries the database and view link will relate those queries using where clause.

For ex :  you want to render  employees based on department as a master - child ..


View Link = DepartmentsVO --> EmployeesVO

select DepartmentId from DepartmentsVO and DepartmentId from EmployeesVO and the click Add . Let cardinality be 1 to * [ Means : One department can contain many employees ] This cardinality will have an impact in the accessor generation .

In the next step


Generate Accessor :

 By default Destination Accessor , In View Object  : DepartmentsVO check box ll be selected . we will check the In View Object  : Employees VO in the Source Accessor.  This will add some code in both the VO Row Impl class .

 DepartmentsVO :

    public RowIterator getEmployeesVO() {
        return (RowIterator)getAttributeInternal(EMPLOYEESVO);
    }


Employees VO :

    public Row getDepartmentsVO() {
        return (Row)getAttributeInternal(DEPARTMENTSVO);
    }


The cardinality is 1 to * [1 to Many ] so ideally a department can be able to get all employees in it and tats why it has an accessor defined in its  DepVORowImpl class with return type Row Iterator . And the accessor in EmpVORowImpl will return a single row (as an employee can be in only one dept )

If the cardinality is 1 to 1  > Both the class will have a return type Row as it says 1 to 1 .
you can use these methods as Groovy expressions to get values in the ADF BC attribute level and in AM Impl class..


Monday, 25 April 2016

Insert Rows in to ADF View Object Programatically

Insert Rows in to ADF View Object Programatically

Following are the use cases pertaining to this topic

1. Insert Rows into ADF View Object Programatically.
2. Insert Rows into a ADF View Object from a ADF Table which is a combination of multiple tables (for example : ADF Table in the jsp page contains mixture of columns from various tables and we need to take only some column data and save it in target ADF VO.

Create a View object from multiple entities (( Assuming you have a View Object SourceVO1 ).Drag and drop the View Object data control on to the page as ADF Table.Create an ADF button at the bottom of the table. Create Action Listener for the button. you must have the target View Object ready to store the values. Since you have created ADF Table on the page the binding section will have the bindings created for the View Object and to access its collection model .For more on bindings section ADF Bindings. Now we need to add the target View Object to the page bindings section.

This part of the section also describes about How to Create Tree Table binding.
Go to the Bindings section of your page. Click Plus icon

 Select tree from the Insert Item window and click ok.


Click Add button as shown . This will list all of the View Objects added to the Application Module

 Choose the desire View Object in which you are going to save the records.


Click at the plus icon and select Add Rule .


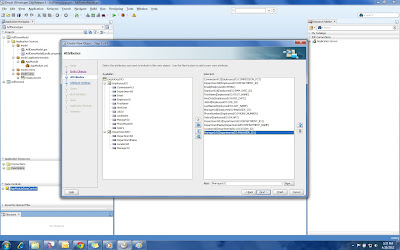
This window will bring down all of the attributes that target view object has.you can shuttle the necessary attributes to the righter side and click ok . Now the Target View Object added as Tree binding can be seen under Bindings section.


Now we will write the java code to insert rows. As we have already created an Action Listener for the button,go to the method of that java class and write this code.

//Code to get the bindings for TargetVO :
    
         DCBindingContainer bindings2 =
            (DCBindingContainer)BindingContext.getCurrent().getCurrentBindingsEntry();
             
        JUCtrlHierBinding obj = (JUCtrlHierBinding)bindings2.findCtrlBinding("ProgrammaticVO1");
        ViewObject targetVO = obj.getViewObject();
   DCBindingContainer bindings =
            (DCBindingContainer)BindingContext.getCurrent().getCurrentBindingsEntry();
        DCIteratorBinding empIter =
            bindings.findIteratorBinding("SourceVO1Iterator");
//SourceVO1Iterator is the iterator under Executables section for the SourceVO1 bindings.
        RowSetIterator roleRSIters = empIter.getRowSetIterator();
        RowSetIterator rs1 = roleRSIters.getRowSet().getViewObject().createRowSetIterator(null);
        NameValuePairs nvp = null;
        while (rs1.hasNext()) {
            Key key = rs1.next().getKey();
            Row r = rs1.getRow(key);           
           
            nvp = new NameValuePairs();
            nvp.setAttribute("Empid",r.getAttribute("EmployeeId"));
            nvp.setAttribute("Nameone",r.getAttribute("FirstName"));
            nvp.setAttribute("Nametwo",r.getAttribute("LastName"));
            targetVO.createAndInitRow(nvp);
         }
       
        rs1.closeRowSetIterator();
        targetVO.getApplicationModule().getTransaction().commit();

Getting the View object in MB and performing operations on it is not a good practice.

Saturday, 23 April 2016

ADF Dynamic Region

ADF Dynamic Region | Working with Oracle ADF Dynamic Regions

ADF Region is used to render a bounded taskflow in a JSF page . The primary use of ADF Region is u can put  various pieces of application functionality in a bounded task flow. A single JSF page can contain many taskflows added as regions and each region may contain different content.


The sections pointed with arrows are different taskflows added as as a regions in a single JSF Page.The Taskflow which is added as ADF Region must contain at least one view activity.

Difference between ADF Region and Dynamic Region ?

Region added in a JSF Page can be invoked based on some action like button click or link that renders specific taskflow in which the region formed . various regions can also be displayed as a stand by at a time when the page loads.In Dynamic Region you do not need to drag and drop the required regions on to the JSF page instead your taskflows will be identified by using the taskflow ID on some action. The task flow binding dynamically determines the values of its ID at run time . In the above picture i have dragged and dropped four taskflows as a region in a JSF Page . But Dynamic Region simplifies this and allows us to swap between taskflows using Dynamic Region link where it store the task flow id in a managed bean and render the pages based on the task flow ID it gets at runtime .

Hope this gives you the basic idea on the concept and we will move ahead for creating one .


Create two taskflows :
AdfDemoApps\AdfDemoUi\public_html\WEB-INF\TaskFlows\CountriesFlow.xml,
AdfDemoApps\AdfDemoUi\public_html\WEB-INF\TaskFlows\EmployeesFlow.xml

Create two page fragments :
AdfDemoApps\AdfDemoUi\public_html\pages\CountriesRegionPage.jsff
AdfDemoApps\AdfDemoUi\public_html\pages\EmpRegionPage.jsff


Drag & drop the CountriesRegionPage.jsff in CountriesFlow.xml and  EmpRegionPage.jsff in EmployeesFlow.xml.We need a jsp page to run these taskflows. Create a JSF Page DynamicRegionMain.jspx under AdfDemoApps\AdfDemoUi\public_html\pages. In the Create JSF Page dialog under Initial Page Layout and Content section i have selected Oracle Three Column Layout for the rich look and to split the user screen into two so that we can have action links at one side and actual pages at other side.

Now Drag and drop the EmployeesFlow.xml into the DyamicRegionMain.jspx we just created and select Dynamic Region. In the Next step it will ask you to specify Managed Bean . Click Add symbol  and create one .  Bean name is DynamicRegionBean under package bean and click ok. you can also create managed bean separately and  choose from the drop down. click ok in the Edit Task Flow Binding dialog.


The next two steps are important

Drag and drop the EmployeesFlow.xml  in the left panel of the page and choose Dynamic Region Link > dynamicRegion1.
Drag and drop the CountriesFlow.xml  in the left panel of the page and choose Dynamic Region Link > dynamicRegion1.
As we already have one Dynamic Region we are appending our taskflows to the same region link .

When you drop a taskflow onto a JSF page to create an ADF dynamic region , JDeveloper adds an af:region tag to the page . This tag contains a reference to a task flow binding

<f:facet name="center">
            <af:region value="#{bindings.dynamicRegion1.regionModel}" id="r1"
                       partialTriggers="::cl1 ::cl2"/>
 </f:facet>


An ADF dynamic region link swaps the taskflows within an ADF dynamic region . Look at the below code snippet in the DynamicRegionBean. java

Jspx :

     <af:commandLink text="EmployeesFlow"
                              action="#{viewScope.DynamicRegionBean.employeesFlow}"
                              id="cl1"/>
              <af:spacer width="10" height="10" id="s1"/>
      <af:commandLink text="CountriesFlow"
                              action="#{viewScope.DynamicRegionBean.countriesFlow}"
                              id="cl2"/>
Bean :

    private String taskFlowId =
        "/WEB-INF/TaskFlows/EmployeesFlow.xml#EmployeesFlow";

    public DynamicRegionBean() {

        super();

    }

    public TaskFlowId getDynamicTaskFlowId() {

        return TaskFlowId.parse(taskFlowId);
    }

    public String employeesFlow() {

        taskFlowId = "/WEB-INF/TaskFlows/EmployeesFlow.xml#EmployeesFlow";
        return null;
    }

    public String countriesFlow() {

        taskFlowId = "/WEB-INF/TaskFlows/CountriesFlow.xml#CountriesFlow";
        return null;
    }

The Managed bean stores the value of the task flow ID that displays inside the dynamic region
when a user click on any link its corresponding method will be called and thus taskFlowId will be changed and corresponding page will be rendered.

Note :
you can add an ADF Dynamic Region Link if you already have at least one ADF Dynamic Region on a page. a menu displays all of the dynamic regions currently on the page

Save All .  Right Click on DynamicRegionMain.jspx and choose Run . The Output

Thursday, 21 April 2016

Create a ADF Page and Use the Data Controls Panel

What Happens When You Create a ADF Page and Use the Data Controls Panel : ADF Insight View


It is not over when it comes to ADF View Controller .You created a page , it runs and you enjoy seeing the output .The Fact is ADF creates a lot of XML files for each file you create and all files have reference to it . If any of these files are misplaced or removed then you will have tough time to debug and you will end up creating the project again .  so in the way , i will tell you about what are the files will be created and updated when you create a jsf page fragment , jspx page and using a data control to bring up the populated data.

Before starting, have a look at this post how-to-create-oracle-adf-page . I will explain the concepts based on the post so that it will be useful to understand

DataBindings.cpx

what is Page Definition file ?

when you create jsp file and drop a data control on to  a page , ADF View controller creates another file called PageDef.xml to store all the bindings , collection model it uses and the iterator defined.


Suppose in our case we dropped  employees data control on the sample page . Now when we look at the PageDef.xml there are three tabs for various purposed defined . Bindings section contains the Data control we used to drag and drop from the Data Control panel. here it is EmployeesVO1 .  Executables part contains the iterators for the Bindings we added . Every iterator refers a VO instance (i.e a collection) corresponding to its bindings .  The EmployeesVO1 uses EmployeesVO1Iterator to loop the data and print in the page .( for ex : when we have a java arraylist that contains data and we use iterator to loop and print it accordingly. The real use will be like this in a page #{bindings.EmployeesVO1Iterator.estimatedRowCount})
You can even create a new ADF binding on the fly and make use of it through EL.

Source code for the SamplePageDef.xml

<?xml version="1.0" encoding="UTF-8" ?>
<pageDefinition xmlns="http://xmlns.oracle.com/adfm/uimodel"
                version="11.1.1.61.92" id="SamplePageDef" Package="pages">
  <parameters/>
  <executables>
    <variableIterator id="variables"/>
    <iterator Binds="EmployeesVO1" RangeSize="25"
              DataControl="AppModuleDataControl" id="EmployeesVO1Iterator"/>
  </executables>
  <bindings>
    <tree IterBinding="EmployeesVO1Iterator" id="EmployeesVO1">
      <nodeDefinition DefName="model.view.EmployeesVO" Name="EmployeesVO10">
        <AttrNames>
          <Item Value="CommissionPct"/>
          <Item Value="DepartmentId"/>
          <Item Value="Email"/>
          <Item Value="EmployeeId"/>
          <Item Value="FirstName"/>
          <Item Value="HireDate"/>
          <Item Value="JobId"/>
          <Item Value="LastName"/>
          <Item Value="ManagerId"/>
          <Item Value="PhoneNumber"/>
          <Item Value="Salary"/>
        </AttrNames>
      </nodeDefinition>
    </tree>
  </bindings>
</pageDefinition>


Now lets talk about DataBindings.cpx .


This file will be created when you create any page first time in the ADF View Controller project . This file will contains the pages you create in the ADF view controller project .  It has Page Mappings , Page Definition Usages, Data Control Usages .Page Mappings contains two sections path and usageId. Path is the location of the file in contextual path . Page Definition Usages contains the Id and path for the binding file created for a jsf or jsp page .  Data Control Usages contains the application modules

Source Code for DataBindings.cpx

<?xml version="1.0" encoding="UTF-8" ?>
<Application xmlns="http://xmlns.oracle.com/adfm/application"
             version="11.1.1.60.13" id="DataBindings" SeparateXMLFiles="false"
             Package="view" ClientType="Generic">
  <pageMap>
    <page path="/pages/Sample.jspx" usageId="view_SamplePageDef"/>
  </pageMap>
  <pageDefinitionUsages>
    <page id="view_SamplePageDef" path="pages.SamplePageDef"/>
  </pageDefinitionUsages>
  <dataControlUsages>
    <BC4JDataControl id="AppModuleDataControl" Package="model.applicationmodule"
                     FactoryClass="oracle.adf.model.bc4j.DataControlFactoryImpl"
                     SupportsTransactions="true" SupportsFindMode="true"
                     SupportsRangesize="true" SupportsResetState="true"
                     SupportsSortCollection="true"
                     Configuration="AppModuleLocal" syncMode="Immediate"
                     xmlns="http://xmlns.oracle.com/adfm/datacontrol"/>
  </dataControlUsages>
</Application>


How the  Data is being fetched and displayed in the page using ADF bindings ?

After we create a ADF Table dropping a Data Control on the jsp page, binding section identifies the corresponding collection model associated with it and creates the iterator. Once it is done it loops through the data collection using iterator and displays the data accordingly. Look at the sample code below

<af:table value="#{bindings.EmployeesVO1.collectionModel}" var="row"
                  rows="#{bindings.EmployeesVO1.rangeSize}"
                  emptyText="#{bindings.EmployeesVO1.viewable ? 'No data to display.' : 'Access Denied.'}"
                  fetchSize="#{bindings.EmployeesVO1.rangeSize}"
                  rowBandingInterval="0" id="t1">
    <af:column sortProperty="CommissionPct" sortable="true"
                     headerText="#{bindings.EmployeesVO1.hints.CommissionPct.label}"
                     id="c2">
            <af:outputText value="#{row.CommissionPct}" id="ot2">
              <af:convertNumber groupingUsed="false"
                                pattern="#{bindings.EmployeesVO1.hints.CommissionPct.format}"/>
            </af:outputText>
          </af:column>
</af:table >

you get a row property to uniquely identify a row representation data and access its columns data

Tuesday, 19 April 2016

View Object based on Multiple ADF Entity Objects

How to Create Oracle ADF View Object based on Multiple ADF Entity Objects

Before getting started on creating VO based on multiple EO's , we need to do some steps.

1) Create Department EO under model.entity package


While you create DepartmentsEO there will be two associations created automatically
1)DeptMgrFkAssoc
2)EmpDeptFkAssoc

This will be created because at database table level these are the foreign keys set and ADF will automatically recognize and will be created.


Now we are going to create VO that is based on DepartmentsEO and EmployeesEO

Step 1 :

Right Click on Model.View Package and select New View Object

Step 2 :

Create View Object dialog will open up and give the Name as EmptoDeptVO and Next


Step 3 :

Shuttle EmployeesEO and then DepartmentsEO from Available area to the right side. At the bottom the corresponding association will be selected and shown for the EO being selected  at Selected area . Just click Next


Step 4 :

Shuttle all the attributes from available area to the Selected area and click Next .


Step 5 :

Just click Next .


Step 6 :


you can able to see the query that is formed out of two EO's we added .  you can edit the query by selecting expert from the Sql Mode drop down . Just click Next

Step 7 :

Click Next


Step 8 :

Just Click Next


Step 9:

Select Application Module check box and make sure the info u given is right as given in the screen shot.
Click Next and Next and Finish .


Now your VO is ready . You can start testing by running the AM.